Step-by-Step Guide to Setting Up a Netgear Range Extender

There are two commonly used ways to set up your extender using mywifiext.net.

1. Manual Method

  • First, plug the extender into a power outlet and turn it on.
  • Next, connect your WiFi-enabled device to the extender.
  • Open the Network Manager and select the NETGEAR_EXT network.
  • Launch a web browser of your choice (Firefox or Chrome is recommended).
  • In the address bar, enter mywifiext.net to access the login page. If you encounter any issues, you can contact our experts for immediate assistance.
  • Create a new account if you do not already have one.
  • Sign in using your username and password.
  • Select the WiFi network you want to extend from the available list.
  • Click on the Next button on the screen
  • Finally, click Finish to complete the setup.

Congratulations! Your extender has been successfully set up. You can now place it anywhere for better coverage. If you face any difficulties during the process, feel free to reach out to our award-winning support team for help.

netgear extender setup
There are two commonly used methods to set up your extender using mywifiext.net. One of the easiest methods is the WPS method.

2. WPS Method

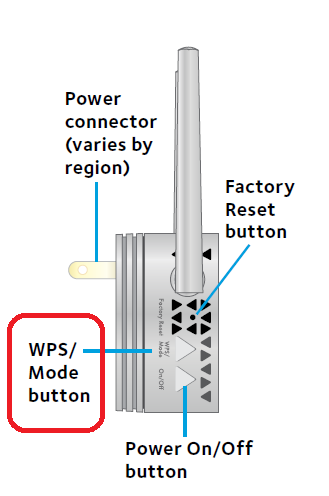
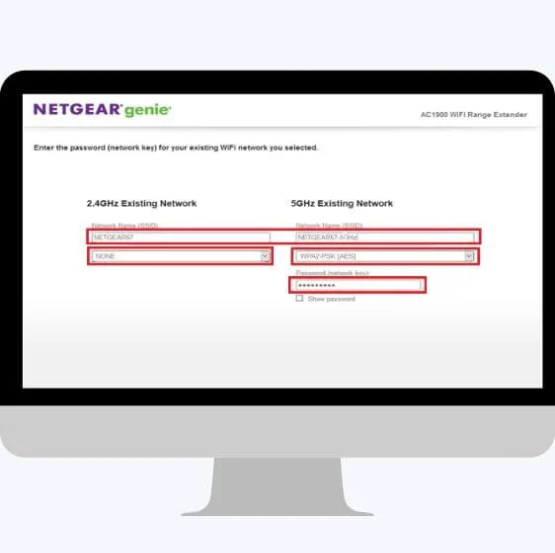
Wi-Fi Protected Setup (WPS) is the fastest and simplest way to configure your extender. Just follow the steps below:

  • First, make sure your extender is powered on and connected to a stable power supply.
  • Locate the WPS button on your extender and press and hold it for a few seconds.
  • Next, press the WPS button on your existing router.
  • Once the connection is successful, the LED light on the extender will turn solid green, indicating that it has been properly configured with the router.
  • If the LED does not become stable, you can contact mywifiext support experts for immediate assistance.
  • For dual-band extenders, repeat the same process to connect both bands.
  • After setup, connect to the extender’s network using the same Wi-Fi password as your router.
  • If you are unsure about the default username or password, refer to the Netgear extender manual for guidance.

Congratulations! Your extender is now successfully set up. Connect your Wi-Fi devices and enjoy a strong, seamless internet connection throughout your home or workplace.

If you are still unable to set up your extender and need expert assistance, feel free to contact our professional technicians for help.

Manual Configuration Without Using an Ethernet Cable

Manual Setup Without an Ethernet Cable

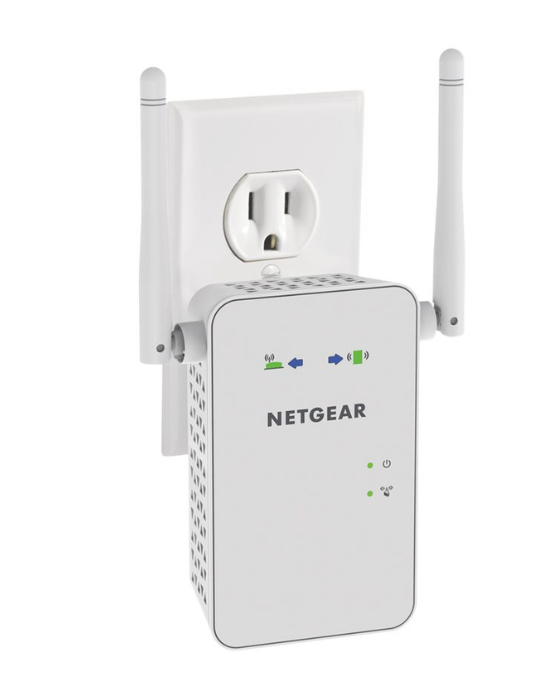
Not all extenders are the same; some models do not include an Ethernet port. Because of this, many users become confused and often ask how to manually set up a Netgear extender when no Ethernet port is available. In our situation, the EX6200 could not be configured using an Ethernet cable, and the Netgear Nighthawk login page would not load either. This left us unsure of what to do next.

If you are experiencing the same issue, there is no need to worry. Simply follow the easy steps provided below to set up your extender without any hassle, just as we did.

Follow the simple instructions below to set up your extender without using an Ethernet cable. A WiFi range extender works as a repeater that helps extend the coverage of your wireless network.

  • First, reset your extender to restore it to the factory default settings.
  • Next, connect your extender to your device using a WiFi connection.
  • Open a web browser and log in to the extender’s web interface by visiting mywifiext.
  • Once the page loads successfully, enter the default username and password for your Netgear extender.
  • If you experience any issues during any step, feel free to contact our expert technicians for assistance.
  • After logging in, follow the Netgear setup wizard to complete the configuration and connect the extender to your router.
  • Finally, reconnect all your devices to the extender.

If you are still unable to complete the Netgear extender setup and need help or advice, contact our award-winning team of expert technicians.

Issues commonly identified during setup

Common Problems Encountered While Setting Up a Range Extender via mywifiext.net

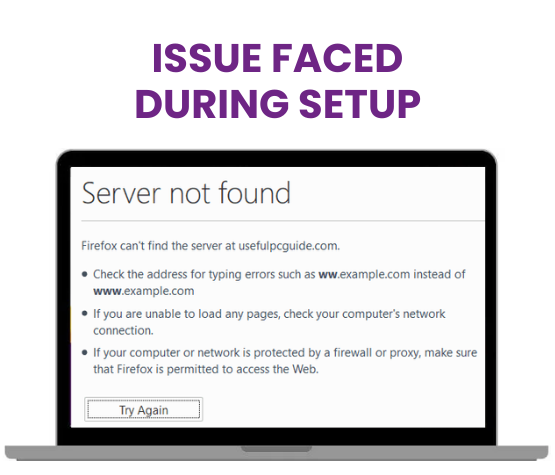
During the setup process of your WiFi range extender, you may come across several common issues. Below are some of the most frequently reported problems users experience:

  • Difficulty accessing mywifiext.net
  • Inability to open mywifiext.local
  • Weak or inconsistent WiFi signal strength
  • Limited coverage provided by the WiFi range extender
  • Unable to connect to the Netgear_ext network
  • LED light not blinking during the setup process
  • Problems related to extender port configuration
  • Unable to reach or sign in to the new extender setup page
  • Forgotten or lost Netgear extender admin login details
  • Trouble accessing the Netgear Genie Smart Setup
issue faced during setup

Common Problems Encountered While Setting Up a Range Extender via http://mywifiext.local

If you’re having trouble setting up your range extender, don’t worry—you’re not the only one. Many users experience similar issues during the setup process. Below are some of the most frequently reported problems:

  • Unable to open http://mywifiext.local
  • Error messages such as “Unable to connect to the internet” or “Server not found”
  • WiFi indicator light not blinking
  • Forgot the login username or password
  • Setup process not completing successfully
  • Difficulty registering the device through mywifiext.local
  • Trouble creating or resetting a new username and password

These are some of the common challenges our users face. If you’re looking for a quick and reliable solution, reach out to our Netgear expert technician team for immediate assistance.

server not found

Common problems you may encounter while setting up your range extender using 92.168.1.250 include:

  • Not being able to open 92.168.1.250 in your web browser
  • Difficulty creating or registering an account on the website
  • Receiving an error message stating “unable to connect”
  • No indicator lights turning on or blinking on the extender
  • Setup process failing to complete successfully

To resolve these issues, refer to our troubleshooting guide for step-by-step assistance. If the problem continues, feel free to contact our Netgear support experts for immediate help.

IP not connected

Solutions for troubleshooting access issues

Common Troubleshooting Steps if You’re Unable to Connect to mywifiext.net

  • Try accessing the page using a different or multiple web browsers.
  • Connect the range extender directly to your device using an Ethernet cable.
  • Enter 192.168.1.250 in your browser’s address bar and check if it opens.
  • Ensure that the extender is properly plugged in and receiving power.
  • Clear or reset your browser settings on the PC, then attempt to reconnect to mywifiext.net.
  • Assign a static IP address to your computer and try again.
  • Perform a factory reset on your range extender and reconfigure it.

Troubleshooting: Unable to Access http://mywifiext.local

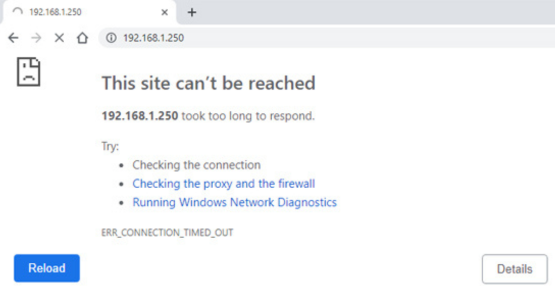
If you are experiencing problems accessing the mywifiext.local webpage, try the following solutions:

  • Place your WiFi extender and router in the same room to ensure a stable connection
  • Restart both the router and the extender
  • Access the page using a different web browser
  • If the issue continues, reset your browser settings
  • Assign a static IP address to your device and try again

Common Solutions & Troubleshooting Tips for Setup Issues Using 92.168.1.250

Below are some helpful troubleshooting steps you can follow if you encounter issues during the setup process:

  • Ensure that both your router and extender are placed in the same room during setup.
  • Verify that the extender is properly plugged into a power outlet and that the power indicator light is turned on.
  • Confirm that both the router and extender have an active internet connection.
  • Clear or reset your web browser and try again.
  • Use a different web browser to rule out browser-related issues. Having at least two browsers installed is recommended (Google Chrome or Mozilla Firefox work best).
  • Restart your device and attempt the setup again.
  • Check that your computer is configured with a static IP address.
  • If you continue to experience difficulties while setting up your extender, feel free to contact our expert support team for assistance.

How to link your Netgear range extender to a hidden wireless network

Hidden SSID

Introduction: Connecting a Netgear Range Extender to a Hidden SSID

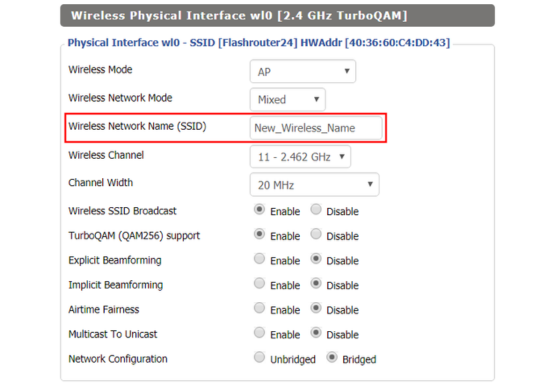
At times, you may need to connect your Netgear range extender to a router whose SSID is hidden. This situation can be confusing and may leave you searching for the right method to complete the setup successfully.

If you are trying to connect your Netgear extender to a hidden SSID, there’s no need to worry. You’ve come to the right place. This guide provides clear, step-by-step instructions to help you connect your Netgear range extender even when the router’s SSID is not visible.

Carefully follow each step to resolve the issue. If you continue to experience difficulties, feel free to contact our Netgear extender expert team at any time—we’re always happy to assist you.

netgear SSID

Follow this simple step-by-step guide to connect your Netgear extender to a hidden SSID.

  • First, ensure that your extender is properly plugged into a power source.
  • Next, connect your device to the extender’s default SSID.
  • Once connected, a setup page should automatically open in your default web browser. If it doesn’t appear, continue with the steps below.
  • Open your web browser and visit mywifiext.net/local.
  • Create an account to manage your extender, then click Next.
  • The Netgear Genie setup page will open—select WiFi Range Extender.
  • If your network SSID is hidden, it will not be displayed on the screen.
  • Choose the option to manually enter the SSID and click Next.
  • Follow the on-screen instructions and make the required changes. You can also modify the SSID name and password during this process.

Once completed, your extender setup is finished. You can now connect your devices to the network and start using it. If you still experience any issues, feel free to contact our Netgear experts for assistance.

Disclaimer: The netgerext.net is a website providing technical resolution and information on various issues and providing online support services for networking gadgets. Use of any images, logo, brand or product names on our site is just for informational and referential purpose. Technical help & services are provided on customer request.